This post is:
A) Delinquent
B) Out of order
C) Heavy on pictures
D) All of the above.
Answer: D
But – having just resized and naming several pictures of the cistern install, felt that there was no time like the present. After looking at several options, we have partnered with Rain Pro NC and Mike Stroud for our rainwater collection project. Mike’s choice of Infiltrator Systems potable water storage tanks seemed like a perfect solution, and because we want the option of using rainwater for potable water, being able to treat any rainwater, using a potable water tank and then NSF approved filtration and UV sanitation seemed like the best way to give us the most options.
Because our overall site plan uses a lot of retaining walls and we’re working hard to minimize the disturbed area outside the walls, we needed to do the cistern installation early on. We also had to plan for any retaining wall penetrations prior to the site pouring of the walls – which meant all the water flow / elevations also needed to be determined. Hope our math was all correct…
The location of the cisterns is outside the west wall. Luckily, the southern end of the west wall is “short” meaning that the existing grade is relatively the same on both sides of the wall before and after our cut and fill work. We dug a LARGE hole, and had to ensure the hole was 1) deep enough and 2) level for the installation of the 4 cross connected tanks. The big excavator was actually “driven” over the retaining wall but using a build up of dirt, and putting the excavator on the trailer and dropping it on the other side. (Hat tip to engineer hubby for figuring that one out – and also to GC Richard for putting plastic over the wall to make sure we didn’t have a permanent red clay stain…)
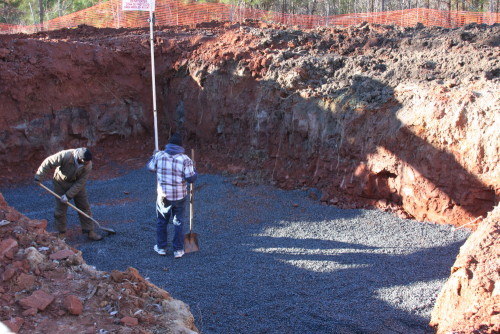
low and level!
The Infiltrator Tanks have a great sealing system and come in 2 halves, making them reasonable to ship. Other tank solutions are one piece – REALLY heavy, and the cost to ship them (because of course there are no local-ish manufacturers) is prohibitive. The 2 piece design also makes them reasonable to move around the site.
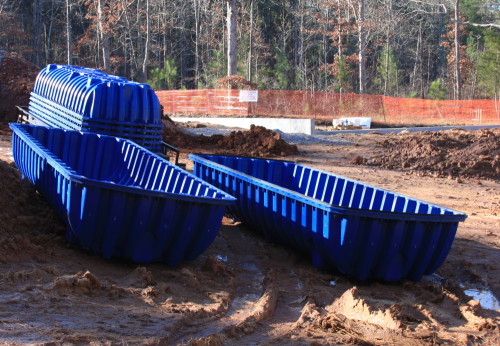
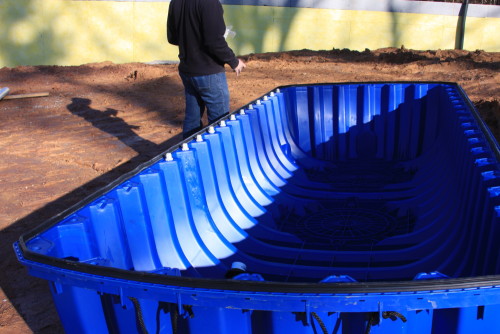
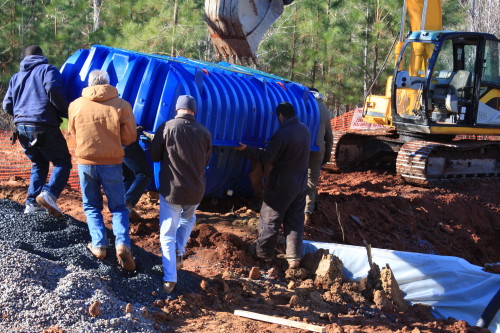
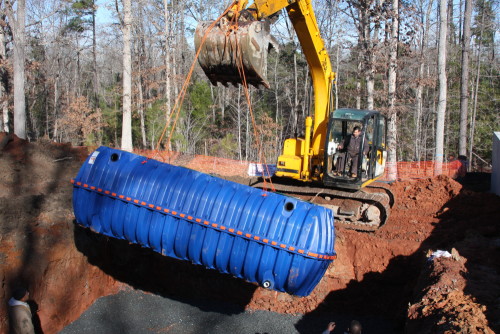
We looked at our water usage using our water bills over the past year or two to size the amount of storage we might need, and then calculated the amount of roof we have (tons- like 11,000 square feet because of the ranch design of the buildings) and then the average monthly rainfall, what happens in a drought, and how much water we could capture in a heavy rain. Lots of math later… we decided on 4 cross connected tanks for about 7000 gallons of water.
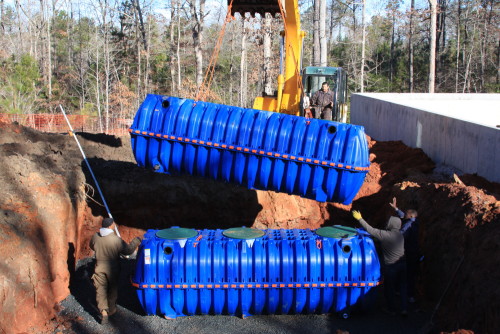
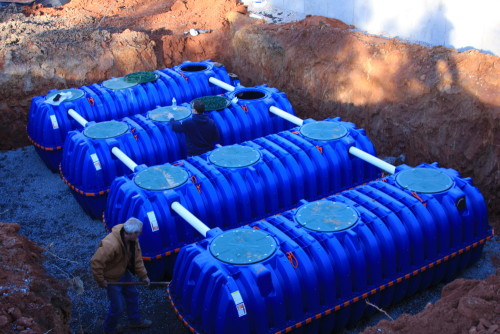
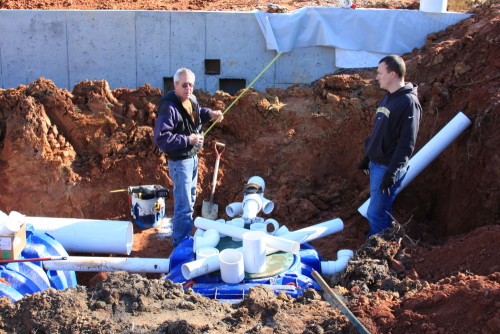
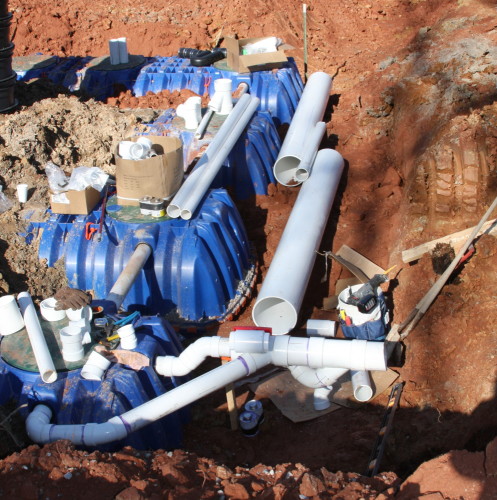
The tanks are cross connected at both the top and the bottom to be able to equalize the pressure and the accessibility. The top connection also managed the overflow when the tanks are full. We also incorporated a “first flush” feature. The first flush is used to capture the first bit of rainwater collected in an “event”. This first water is the most contaminated because it’s hitting the dry roof and rinsing any contaminants with it. So – the first flush is a big pipe that takes the first water, fills up, and when it’s full, the water is diverted to the tank. It does this by just having the large pipe capped off with a slow leak. Genius!
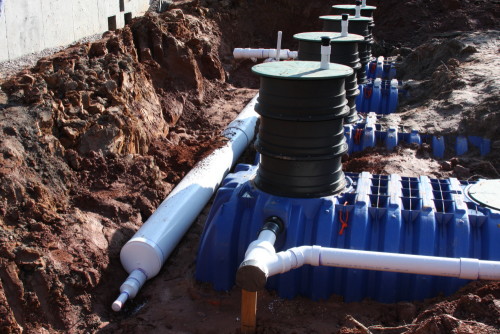
After the tanks were set, cross connected, and all the fittings for the first flush and overflow completed, we had to partially fill them to get some weight in them, and then partially backfill them so they would be protected and not shift. While the tanks can support the weight of a vehicle – because they are outside the wall, we really don’t want anything back there shortly. We will be backfilling up to the level of the black risers shown. The risers provide access to the tank for any pump issues or maintenance.
First phase complete. We’ll be back when we get the rainwater management plan working after the cut / fill / compaction and probably footings.
Merry Christmas!
